Debian Containers for Torizon
Introduction
Toradex provides Docker container images for Torizon that derive from a minimal variant of the Bookworm release of Debian. The purpose is to provide a hierarchy of light images with disabled manual pages and a minimalist set of installed packages that can be used as a foundation for developing customer's applications.
While you can use any container and not necessarily the ones provided by Toradex, you will find out that our containers make your life easier with regards to:
- Running graphical applications
- Not running as root by default
- Setting up hardware access
This article complies with the Typographic Conventions for Torizon Documentation.
Prerequisites
To have a better understanding of this article, the following prerequisites are recommended:
- Computer on Module with Torizon installed.
- (optional) Basic understanding of Docker and
docker runcommand options. - Reading of Torizon OS Overview article.
To get the most from this article and test things in practice, we recommend that you clone the torizon-samples repository to your computer:
$ cd ~
$ git clone --branch=bookworm https://github.com/toradex/torizon-samples.git
$ cd torizon-samples/debian-container
Debian Containers
Toradex has designed a set of Debian-based container images to serve as foundations for application development in Torizon. The containers offer interesting features such as:
- Console only base container;
- Container which makes use of a modern Wayland based graphics stack using the Wayland protocol and a compositor (Weston) running in a separate container;
- Qt-Wayland based container, a full graphics stack container image.
- Easy-to-use Remote Access the Torizon OS GUI Using VNC or RDP on our Weston-based containers.
Each container is built on top of a previous one, adding an increased set of features. There is a diversity of containers available in order to more closely match the minimum dependencies of applications that may be developed on top of them. As the containers are Debian based, specific packages can be further installed with the apt command as required by user's applications.
The following diagram depicts the hierarchy of these containers in Torizon OS. The container images can be freely retrieved from Docker Hub.

How to Choose a Debian Container?
Focusing only on the Debian Containers for Torizon, you might ask yourself "what container should I choose?". It may sound hard at first, but the questions below will help you to make the right choice:
- Am I writing a headless application with no need for Graphical User Interface (GUI)?
Use the torizon/debian container. It is the simplest container ready for application development.
- Do I need a graphics stack for a Graphical User Interface (GUI)?
Choose one of the torizon/weston variants, which come with Weston and Wayland + XWayland pre-configured.
- Do I want to use the Qt framework for building a Graphical User Interface (GUI)?
Instead of using the torizon/weston container, choose one of the torizon/qt5-wayland containers.
- Should I choose a
torizon/<some-container>-vivantevariant?
If you are using an i.MX 8-based SoM and you need GPU graphics acceleration, it is a good idea to choose the vivante variant.
Besides the containers above, Toradex and partners also offer various other Container Images for Torizon, such as development tools to be executed directly in modules (e.g. device tree overlay management), as well as sample containers for demonstrating key features of Toradex hardware and useful application concepts.
How to Deploy a Debian Container to the Board?
There are some options. They are applicable for any container, not only the Debian Containers for Torizon:
- If you are using the Torizon IDE extension, containers are deployed to the board automatically.
- If you are developing from the command-line, or not working with the IDE extension, you can learn more in our article Modifying Torizon OS Debian Based Container Images, more specifically in the section Deploying to the Board.
- For deploying over-the-air and offline updates - including container updates - to one or more devices, use the Torizon Cloud.
This topic has its own article with a more detailed overview and instructions: Deploying Container Images to Torizon OS.
Tags and Versioning
Our Debian container images have their own tags, and a remarkable note is that we purposefully don't use the tag latest. We use semantic versioning for new releases of our container images, tagging the images accordingly. To learn more, read our dedicated article Torizon OS Containers Tags and Versioning.
Details about our Images
Torizon containers are based in the official Debian slim Image.
This section gives more details about our Debian based images and how they can improve the development process. Please take a look at our base Dockerfile hosted on GitHub.
From the start of the base Dockerfile:
ARG IMAGE_ARCH=linux/arm/v7
# For arm64v8 use:
# ARG IMAGE_ARCH=linux/arm64/v8
ARG IMAGE_TAG=bookworm-slim
# ARG DEBIAN_SNAPSHOT=20210408T000000Z
ARG TORADEX_SNAPSHOT=20210909T072507Z
ARG USE_TORADEX_SNAPSHOT=1
ARG ADD_TORADEX_REPOSITORY=1
FROM debian:$IMAGE_TAG AS base
Two important considerations arise from the above snippet:
- Torizon images are multi-platform aware. The architecture is automatically chosen based on the architecture of the host. If pulling a Torizon image results in a wrong architecture,
docker pull --platform=<IMAGE_ARCH> ...can be used to forcefully specify the intended architecture. Similarly, when building on top of Torizon images,docker build --pull --platform=<IMAGE_ARCH> ...can be used to enforce the build architecture as well.
The Dockerfile also adds a user and group ID to match those used by the host OS:
RUN groupadd --gid 1000 torizon \
    && useradd --gid 1000 --uid 1000 --create-home torizon
The enablement of the package repository feed provided by Toradex is performed by the following Dockerfile instructions:
ADD https://feeds.toradex.com/debian/toradex-debian-repo.gpg /etc/apt/trusted.gpg.d/
RUN chmod 0644 /etc/apt/trusted.gpg.d/toradex-debian-repo.gpg \
    && echo "deb https://feeds.toradex.com/debian/ testing main non-free" >>/etc/apt/sources.list \
    && echo "Package: *\nPin: origin feeds.toradex.com\nPin-Priority: 900" > /etc/apt/preferences.d/toradex-feeds
You can browse our GitHub repository toradex/torizon-containers and see exactly what is included in each of our Debian images.
Debian With Weston Wayland Compositor
Weston is a Wayland based compositing window manager, basically the piece of software which makes sure that graphical application can be drawn alongside each other. Weston comes with a minimal launcher that allows starting a terminal, but in embedded configurations, the launcher is often disabled/hidden.
The container is Debian Bookworm release based, featuring the Weston Wayland compositor. To pull the container and start it on the module, choose your hardware from the tabs below and follow the instructions given:
(Optional) pull the torizon/weston container image:
# docker pull torizon/weston:$CT_TAG_WESTON
Start the weston compositor:
# docker run -d --rm --name=weston --net=host --cap-add CAP_SYS_TTY_CONFIG \
             -v /dev:/dev -v /tmp:/tmp -v /run/udev/:/run/udev/ \
             --device-cgroup-rule='c 4:* rmw' --device-cgroup-rule='c 13:* rmw' \
             --device-cgroup-rule='c 226:* rmw' \
             torizon/weston:$CT_TAG_WESTON --developer --tty=/dev/tty7
(Optional) pull the torizon/weston container image:
# docker pull torizon/weston:$CT_TAG_WESTON
Start the weston compositor:
# docker run -d --rm --ipc=host --name=weston --net=host --cap-add CAP_SYS_TTY_CONFIG \
             -v /dev:/dev -v /tmp:/tmp -v /run/udev/:/run/udev/ \
             --device-cgroup-rule='c 4:* rmw' --device-cgroup-rule='c 13:* rmw' \
             --device-cgroup-rule='c 226:* rmw' \
             torizon/weston:$CT_TAG_WESTON --developer --tty=/dev/tty7  -- --use-pixman
(Optional) pull the torizon/weston-vivante container image:
# docker pull torizon/weston-vivante:$CT_TAG_WESTON_VIVANTE
Start the weston compositor:
Please, note that by executing the following line you are accepting the terms and conditions of the NXP's End-User License Agreement (EULA)
# docker run -e ACCEPT_FSL_EULA=1 -d --rm --name=weston --net=host --cap-add CAP_SYS_TTY_CONFIG \
             -v /dev:/dev -v /tmp:/tmp -v /run/udev/:/run/udev/ \
             --device-cgroup-rule='c 4:* rmw' --device-cgroup-rule='c 13:* rmw' \
             --device-cgroup-rule='c 199:* rmw' --device-cgroup-rule='c 226:* rmw' \
             torizon/weston-vivante:$CT_TAG_WESTON_VIVANTE --developer --tty=/dev/tty7
To learn more about the device_cgroup_rules section of the docker-compose file above, please refer to the Hardware Access through Control Group Rules (cgroup) section of the Torizon Best Practices Guide
After sending the command above, Weston should start on your display and you are ready to start your Wayland applications.
If the container image is not preinstalled, Docker will download it from Docker Hub and store it on the module -- this will require an internet connection on the device and may take a few minutes. It will start Weston (HDMI on Apalis SoMs, parallel RGB on Colibri SoMs, MIPI-DSI on Verdin SoMs). The container will be started in the background, you can look at the Weston output for debugging by using the Docker logs subcommand:
# docker logs weston
Most of the arguments in this command line make sure that the container can access the necessary hardware (display controller, GPU and input devices) and be notified about hardware changes (through Torizon OS's udev daemon).
On modules without GPU like Colibri iMX7 and Colibri iMX6ULL we add --tty=/dev/tty7 -- --use-pixman to start Weston with Pixman.
Weston creates a Unix socket file so graphical client applications can communicate with it (typically in the 1000-runtime-dir directory under /tmp). By bind mounting /tmp into a second container, a Wayland client application can access the Wayland compositor despite being in separate containers. The Wayland client application will talk to Weston (the Wayland Compositor) through the Unix socket file and draw in a window on Weston.
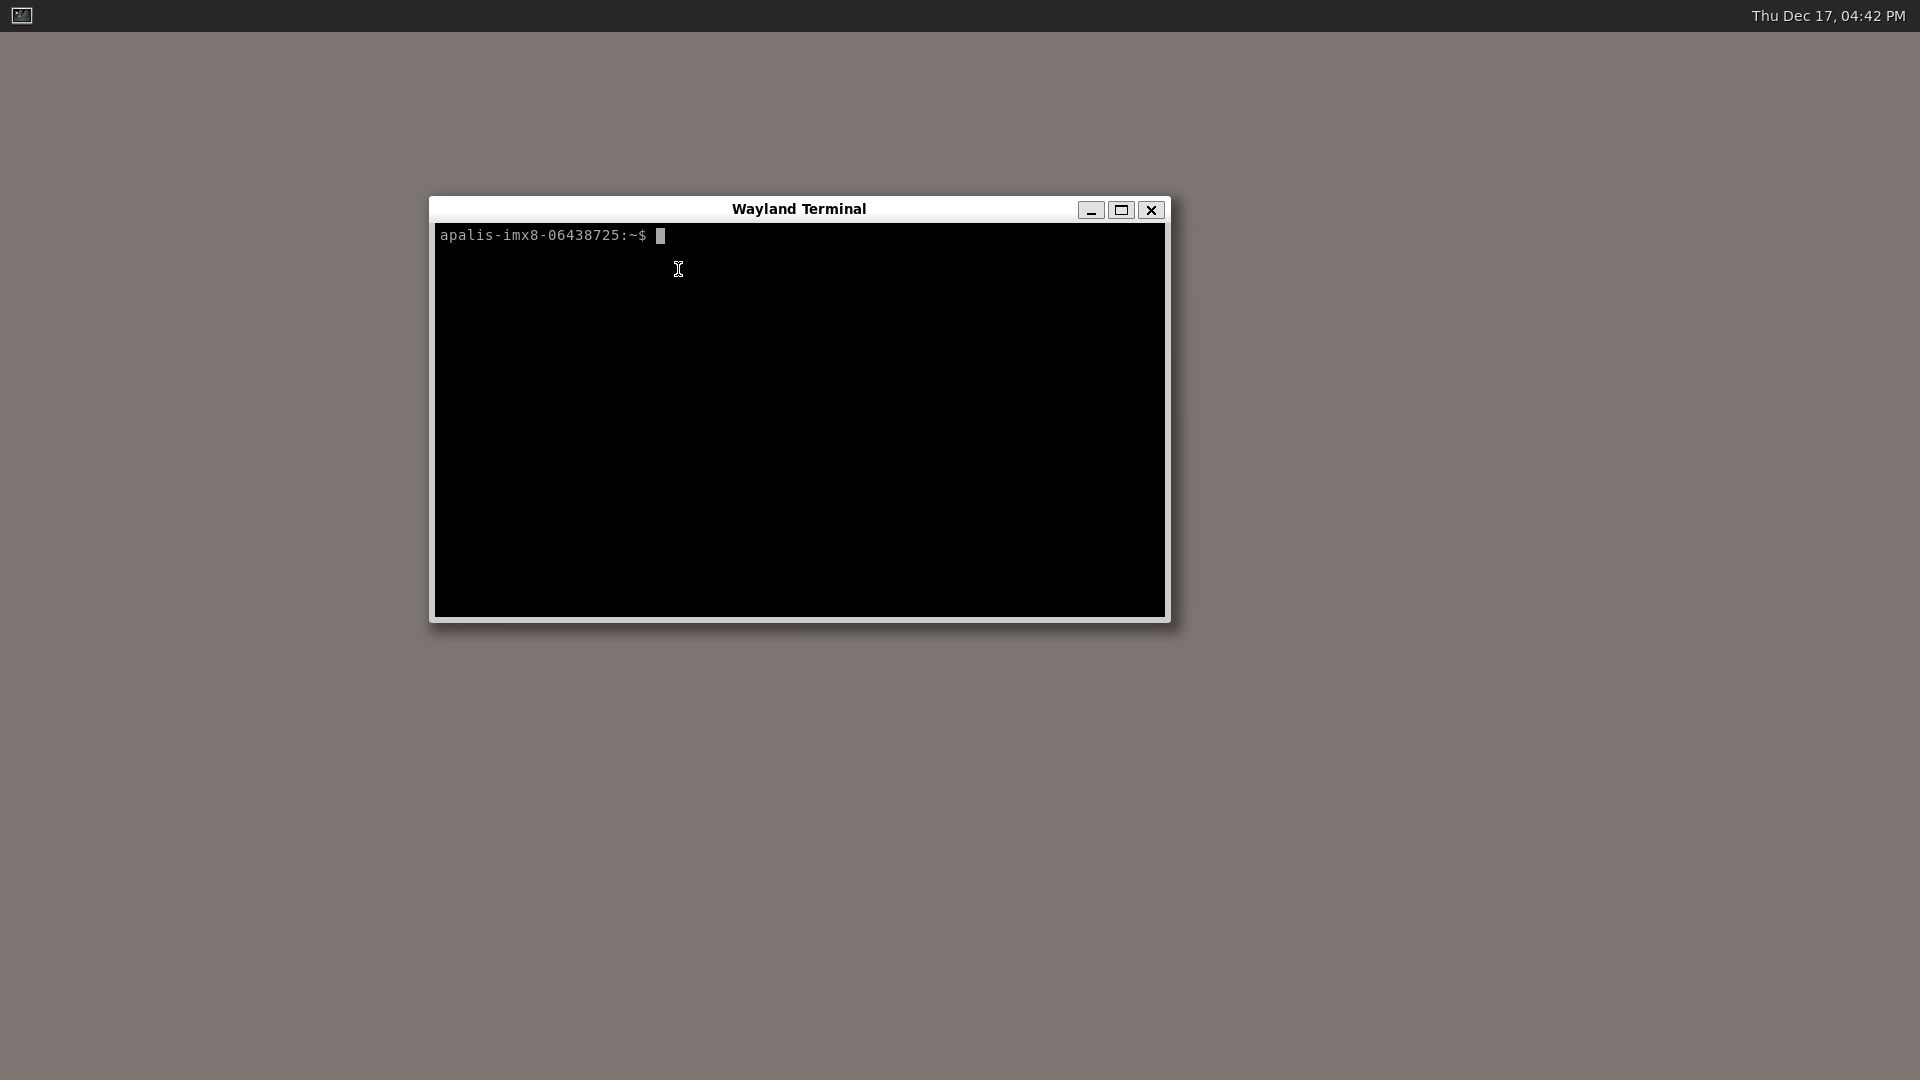
As an example, let's start a second container that reuses the same image, but brings up an application on top of the Wayland compositor. Select your module from the tabs below and follow the instructions:
In order to launch a container named wayland-app and start the weston-terminal, run this command:
# docker run -d --rm --name=wayland-app  \
             -v /dev/dri:/dev/dri -v /tmp:/tmp \
             --device-cgroup-rule='c 226:* rmw' \
             torizon/weston:$CT_TAG_WESTON weston-terminal
In order to launch a container named wayland-app and start the weston-terminal, run this command:
Please, note that by executing the following line you are accepting the terms and conditions of the NXP's End-User License Agreement (EULA)
# docker run -e ACCEPT_FSL_EULA=1 -d --rm --name=wayland-app  \
             -v /dev/dri:/dev/dri -v /dev/galcore:/dev/galcore -v /tmp:/tmp \
             --device-cgroup-rule='c 199:* rmw' --device-cgroup-rule='c 226:* rmw' \
             torizon/weston-vivante:$CT_TAG_WESTON_VIVANTE weston-terminal
you are also giving access to /dev/galcore, meaning you can leverage the Vivante graphics acceleration inside the container.
After sending the command above, Weston should start on your display with the Wayland Terminal opened.
To get a shell inside the container docker exec can be used:
# docker ps
CONTAINER ID        IMAGE                                  COMMAND                  CREATED             STATUS              PORTS               NAMES
ab83ec23855e        torizon/weston:1   "/usr/bin/entry.sh e…"   31 seconds ago      Up 28 seconds                           wayland-app
f4a426310353        torizon/weston:1   "/usr/bin/entry.sh -…"   3 minutes ago       Up 3 minutes                            weston
# docker exec -it weston /bin/bash
This will create a prompt with root privileges inside the container.
Weston Custom Configuration
A dedicated article, Working with Weston on Torizon OS, explains how to set up Weston with custom configuration. Among several possibilities, you can:
- Rotate the screen
- Use a kiosk-shell mode, well suitable for embedded applications
- Use multiple displays concurrently
Remote Access With VNC or RDP
The Weston-based containers come ready to enable a VNC or RDP back-end that allows to remote access a Graphical User Interface (GUI). To learn more, read the article Remote Access the Torizon OS GUI Using VNC or RDP.
Multi-Container Example Using Docker Compose
This section focuses on an example using Docker Compose, which makes it easy to Use Multiple Containers with Torizon OS, in contrast to the previous examples that used the docker run command directly from the command-line, as explained on Run and Manage Containers with Portainer and the Command-line on Torizon.
At the beginning of the article, in the Prerequisites section, you have cloned the torizon-samples repository. Before we move into the explain section, go to the demonstration folder. Make sure that you have followed the instructions provided in this article's Prerequisites first:
$ cd torizon-samples/debian-container
On the board, make sure that all containers are stopped:
# docker stop $(docker ps -a -q)
Docker-compose is used to start multiple containers at the same time, providing shared data volumes, mount points, resource usage limitations and other advantages. You can have a good experience using docker-compose to start our containers and take a glimpse of the development environment. In this case, the demo is showing a browser in kiosk-mode using three containers:
torizon/weston:2ortorizon/weston-vivante:2: The Wayland compositor;portainer/portainer: provides the data that should be displayed by the UI;torizon/chromium:2based on thetorizon/wayland-base:2container, it runs chromium browser in a kiosk-mode, allowing implementation of web-based UIs.
Select your hardware in the box below:
By starting the demonstration using this docker compose file, you are accepting the NXP's End-User License Agreement (EULA).
Then you can start the demo with a single command:
# docker-compose -f <your-docker-compose-file> up
With the above command, you directly attach to the containers you are about to start. To start in detached-mode, you can append -d to the above command.
To use the device_cgroup_rules configuration option we have to use Compose file version 2.4 currently.
Docker Auto Prune
Docker-auto-prune is a systemd service in Torizon OS, that periodically removes:
- all stopped containers
- all networks not used by at least one container
- all dangling images
- all dangling build cache
This service is disabled by default, because removing stopped container could lead to some important container loss. It’s probably not a use case for the production, but it can be useful during development. To enable it, run the following:
# sudo systemctl enable docker-auto-prune.timer